Merchant Setup & Processing
is as easy as 1... 2... 3...
Step 1: Install & Activate the Plugin
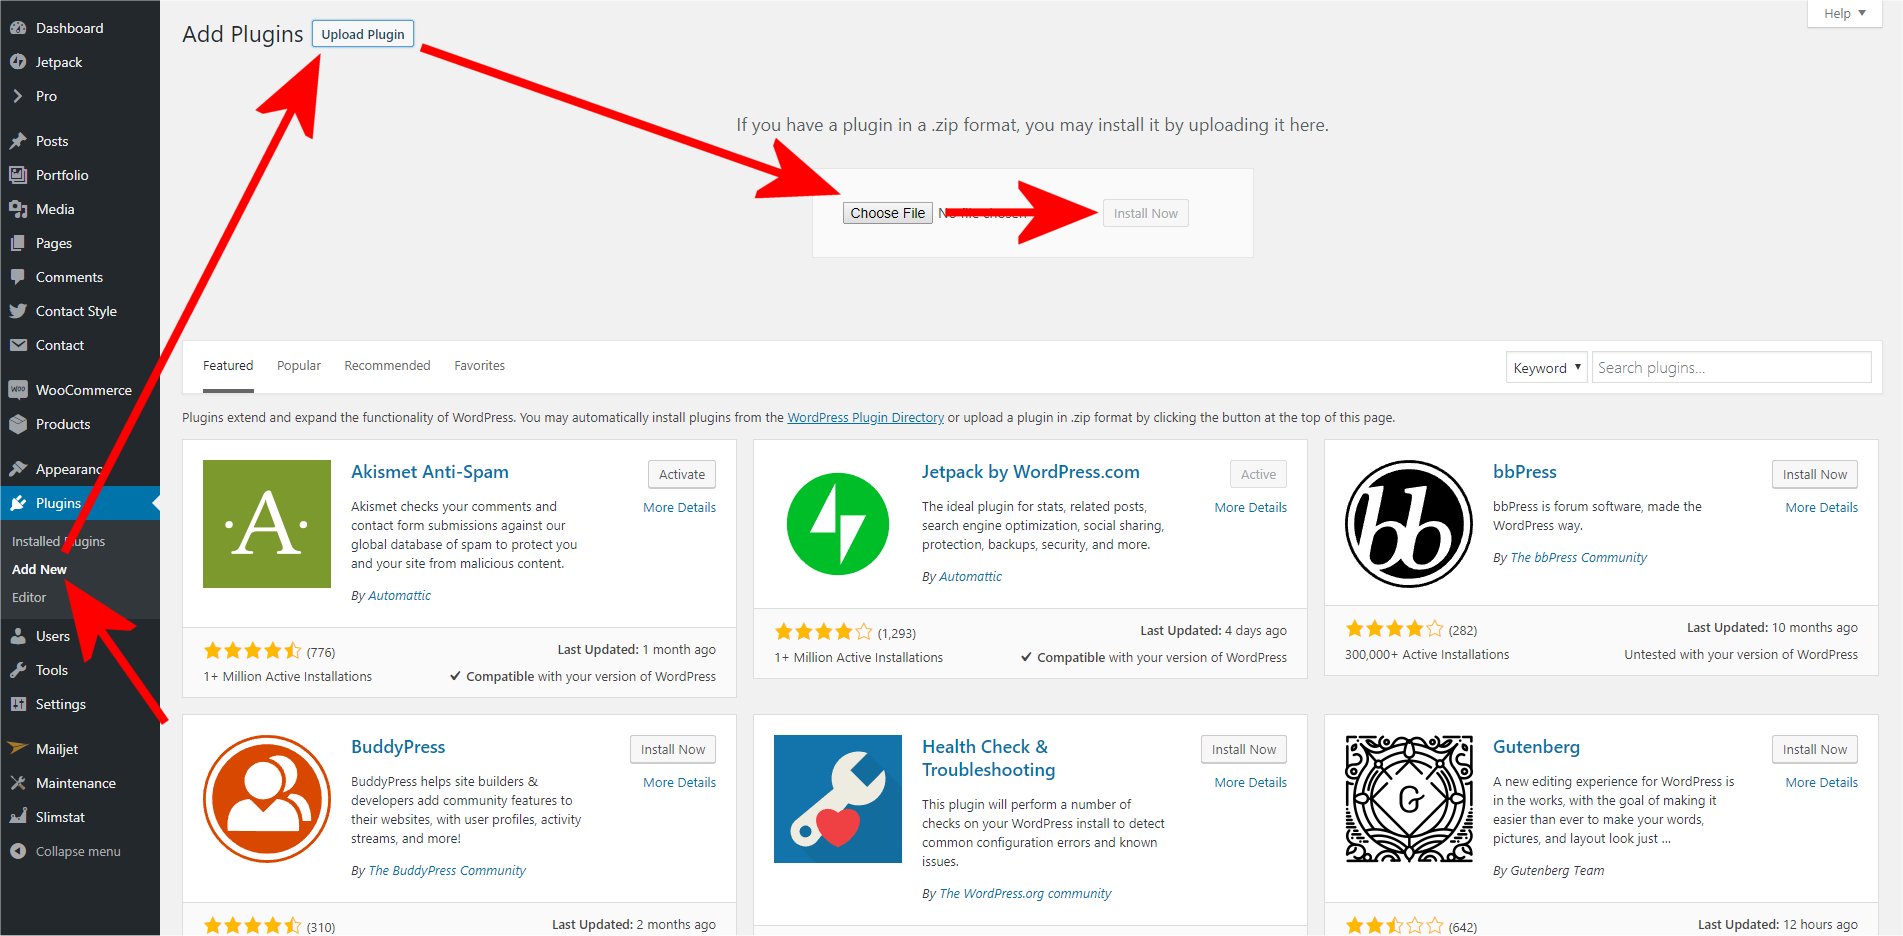
Install and activate the plugin
You can either click the Choose File button and select the zipped plugin file from your hard drive, or just drag and drop the file onto the Choose File button. Once installation is complete, click the Activate Plugin button.
Step 2: Configure the Plugin
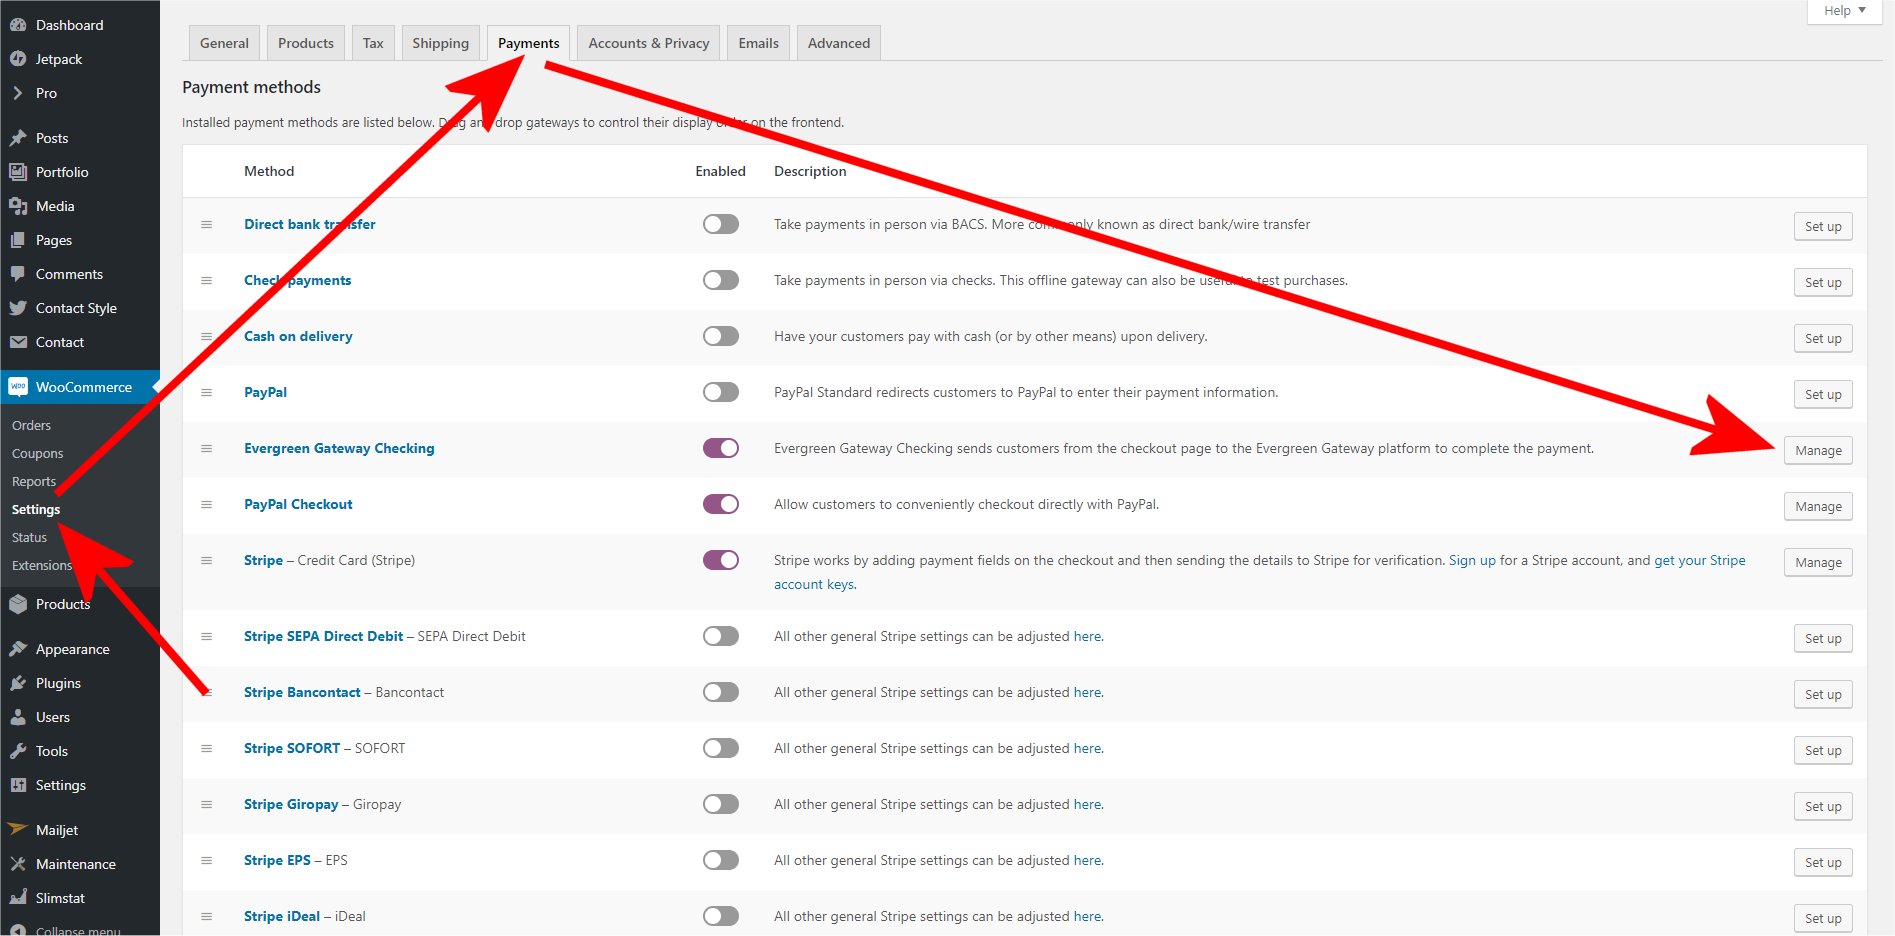
Open the plugin settings page
Go to "WooCommerce > Settings > Payments > Evergreen Gateway Checking".
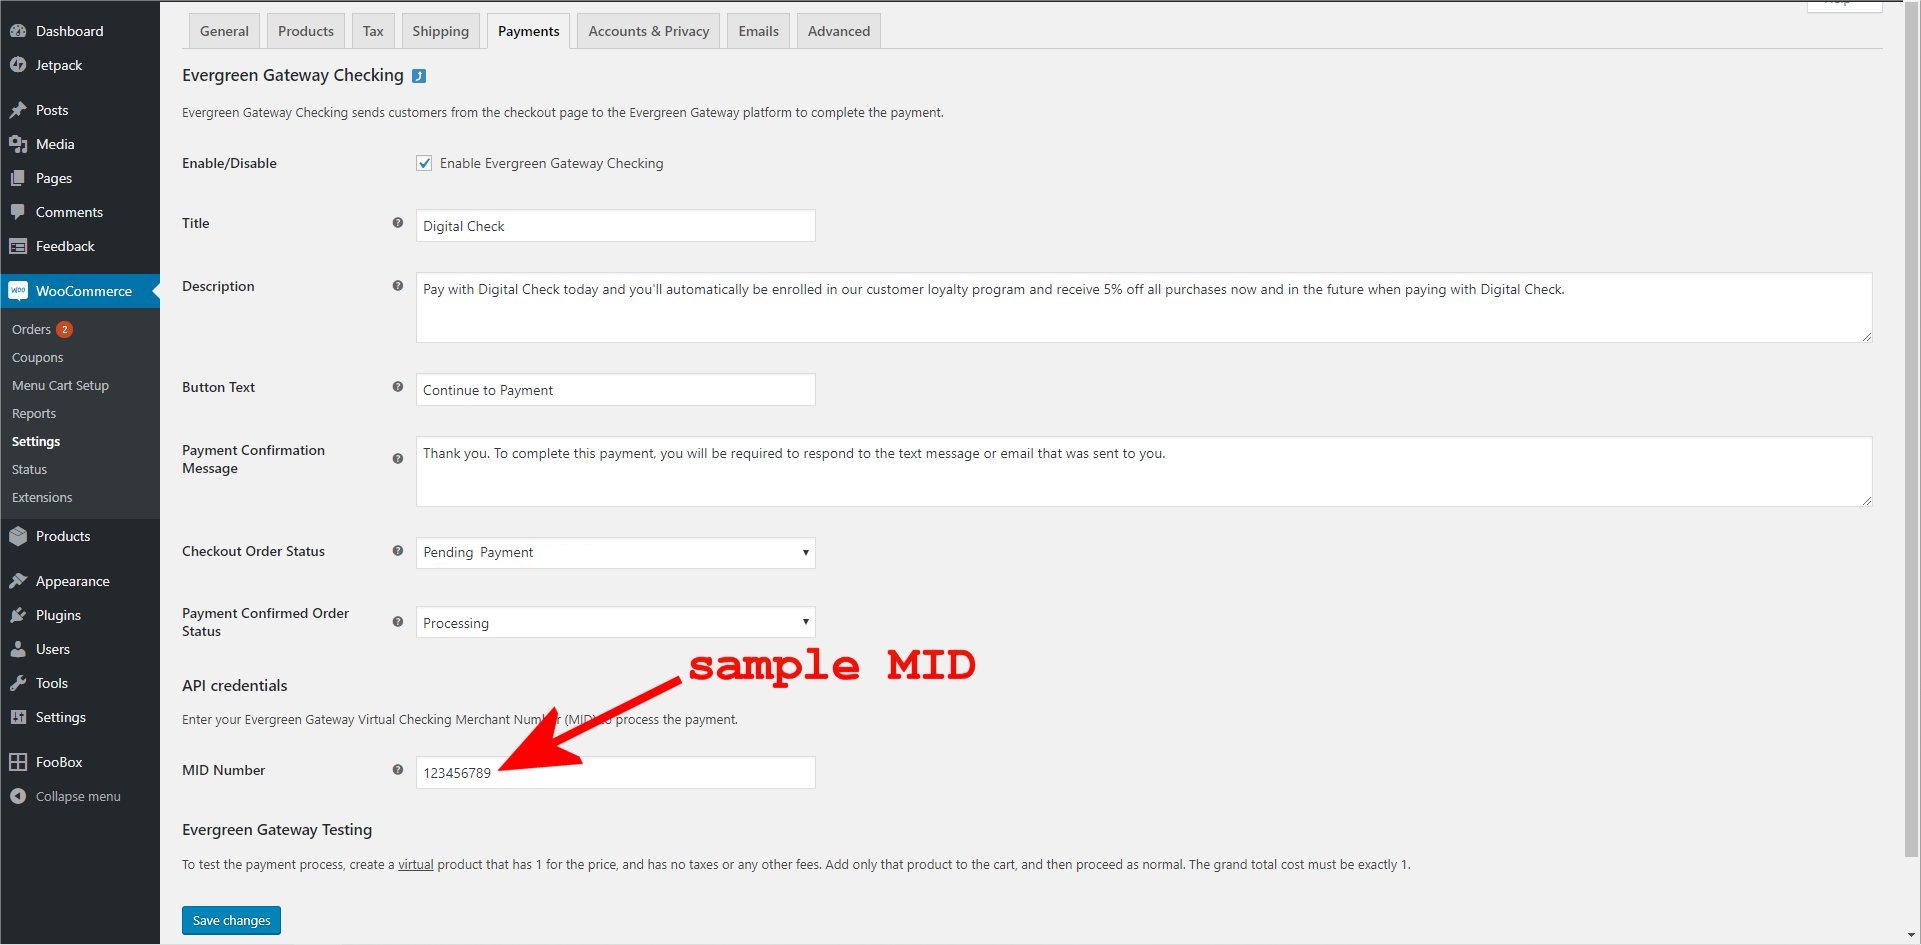
Enter your MID #
Enter your Evergreen Gateway Virtual Checking Merchant ID Number and click Save Changes.
Step 3: Process the Orders
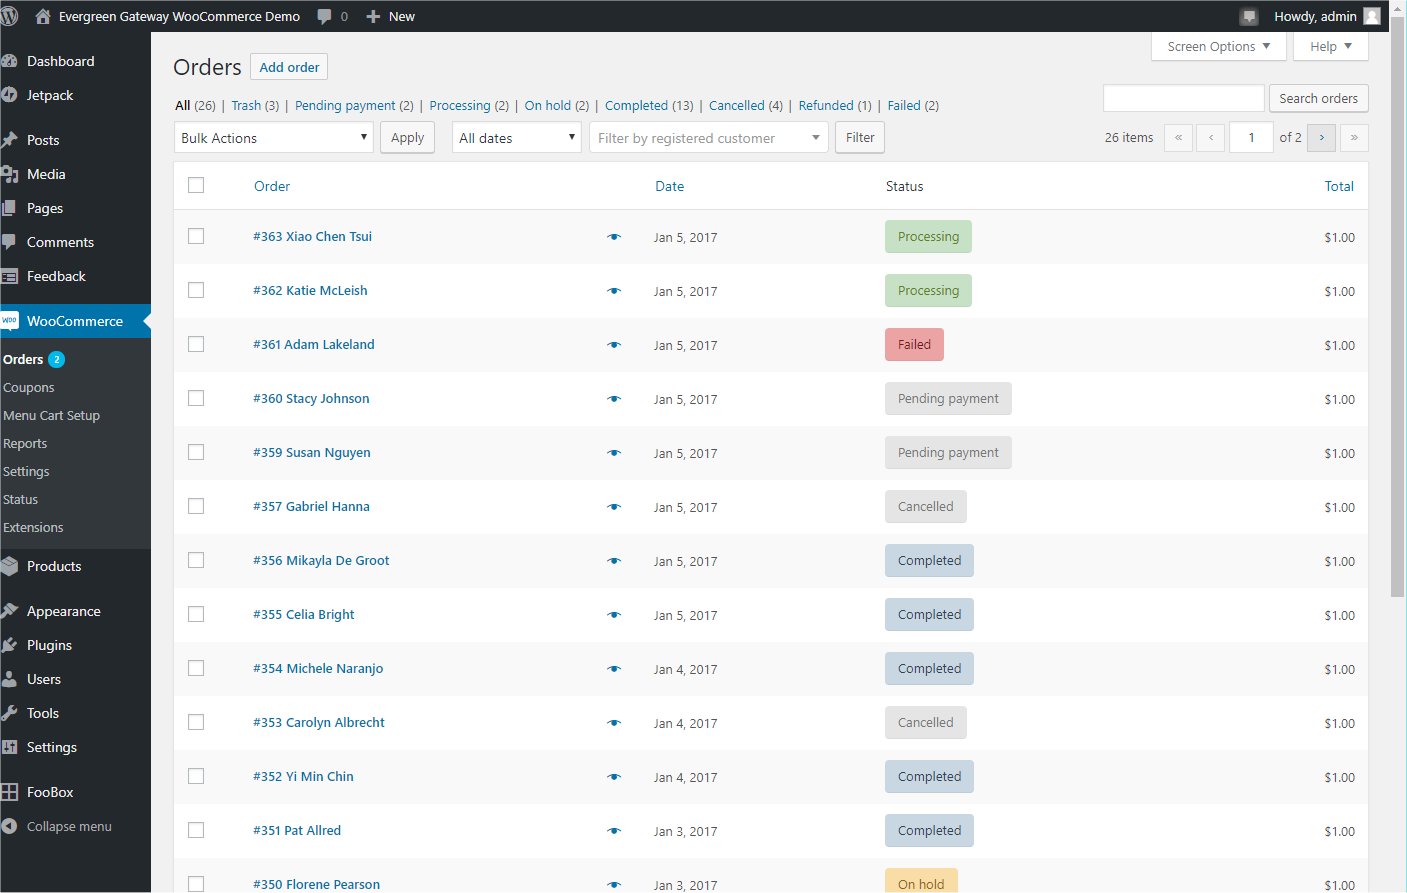
Order processing
When a customer submits an order it will be marked Pending Payment by default. Once the customer has confirmed the payment through Evergreen Gateway via SMS or email, the order will automatically change to Processing. When you ship the product, just change it to Completed and you're done.
It couldn't get any easier than that!
FAQs
Is the order status properly tracked in WooCommerce?
Yes it is! When a customer submits an order it will be marked "Pending Payment". Once the customer has confirmed the payment through Evergreen Gateway via SMS (text message) or email, the order will automatically change to "Processing". If the order is cancelled at any time during the process (prior to confirmation by the customer) the status will automatically change to "Cancelled".
Can I run tests to make sure everything works properly without spending any money?
Absolutely! To test the ordering and payment process, create a virtual product that has $1.00 for the price, and has no taxes or any other fees. The grand total cost on the checkout page must be exactly $1.00. Add only that product to the cart, and then proceed as normal.
How do I get an Evergreen Gateway Merchant Account number?
You can get your merchant number by signing up here.